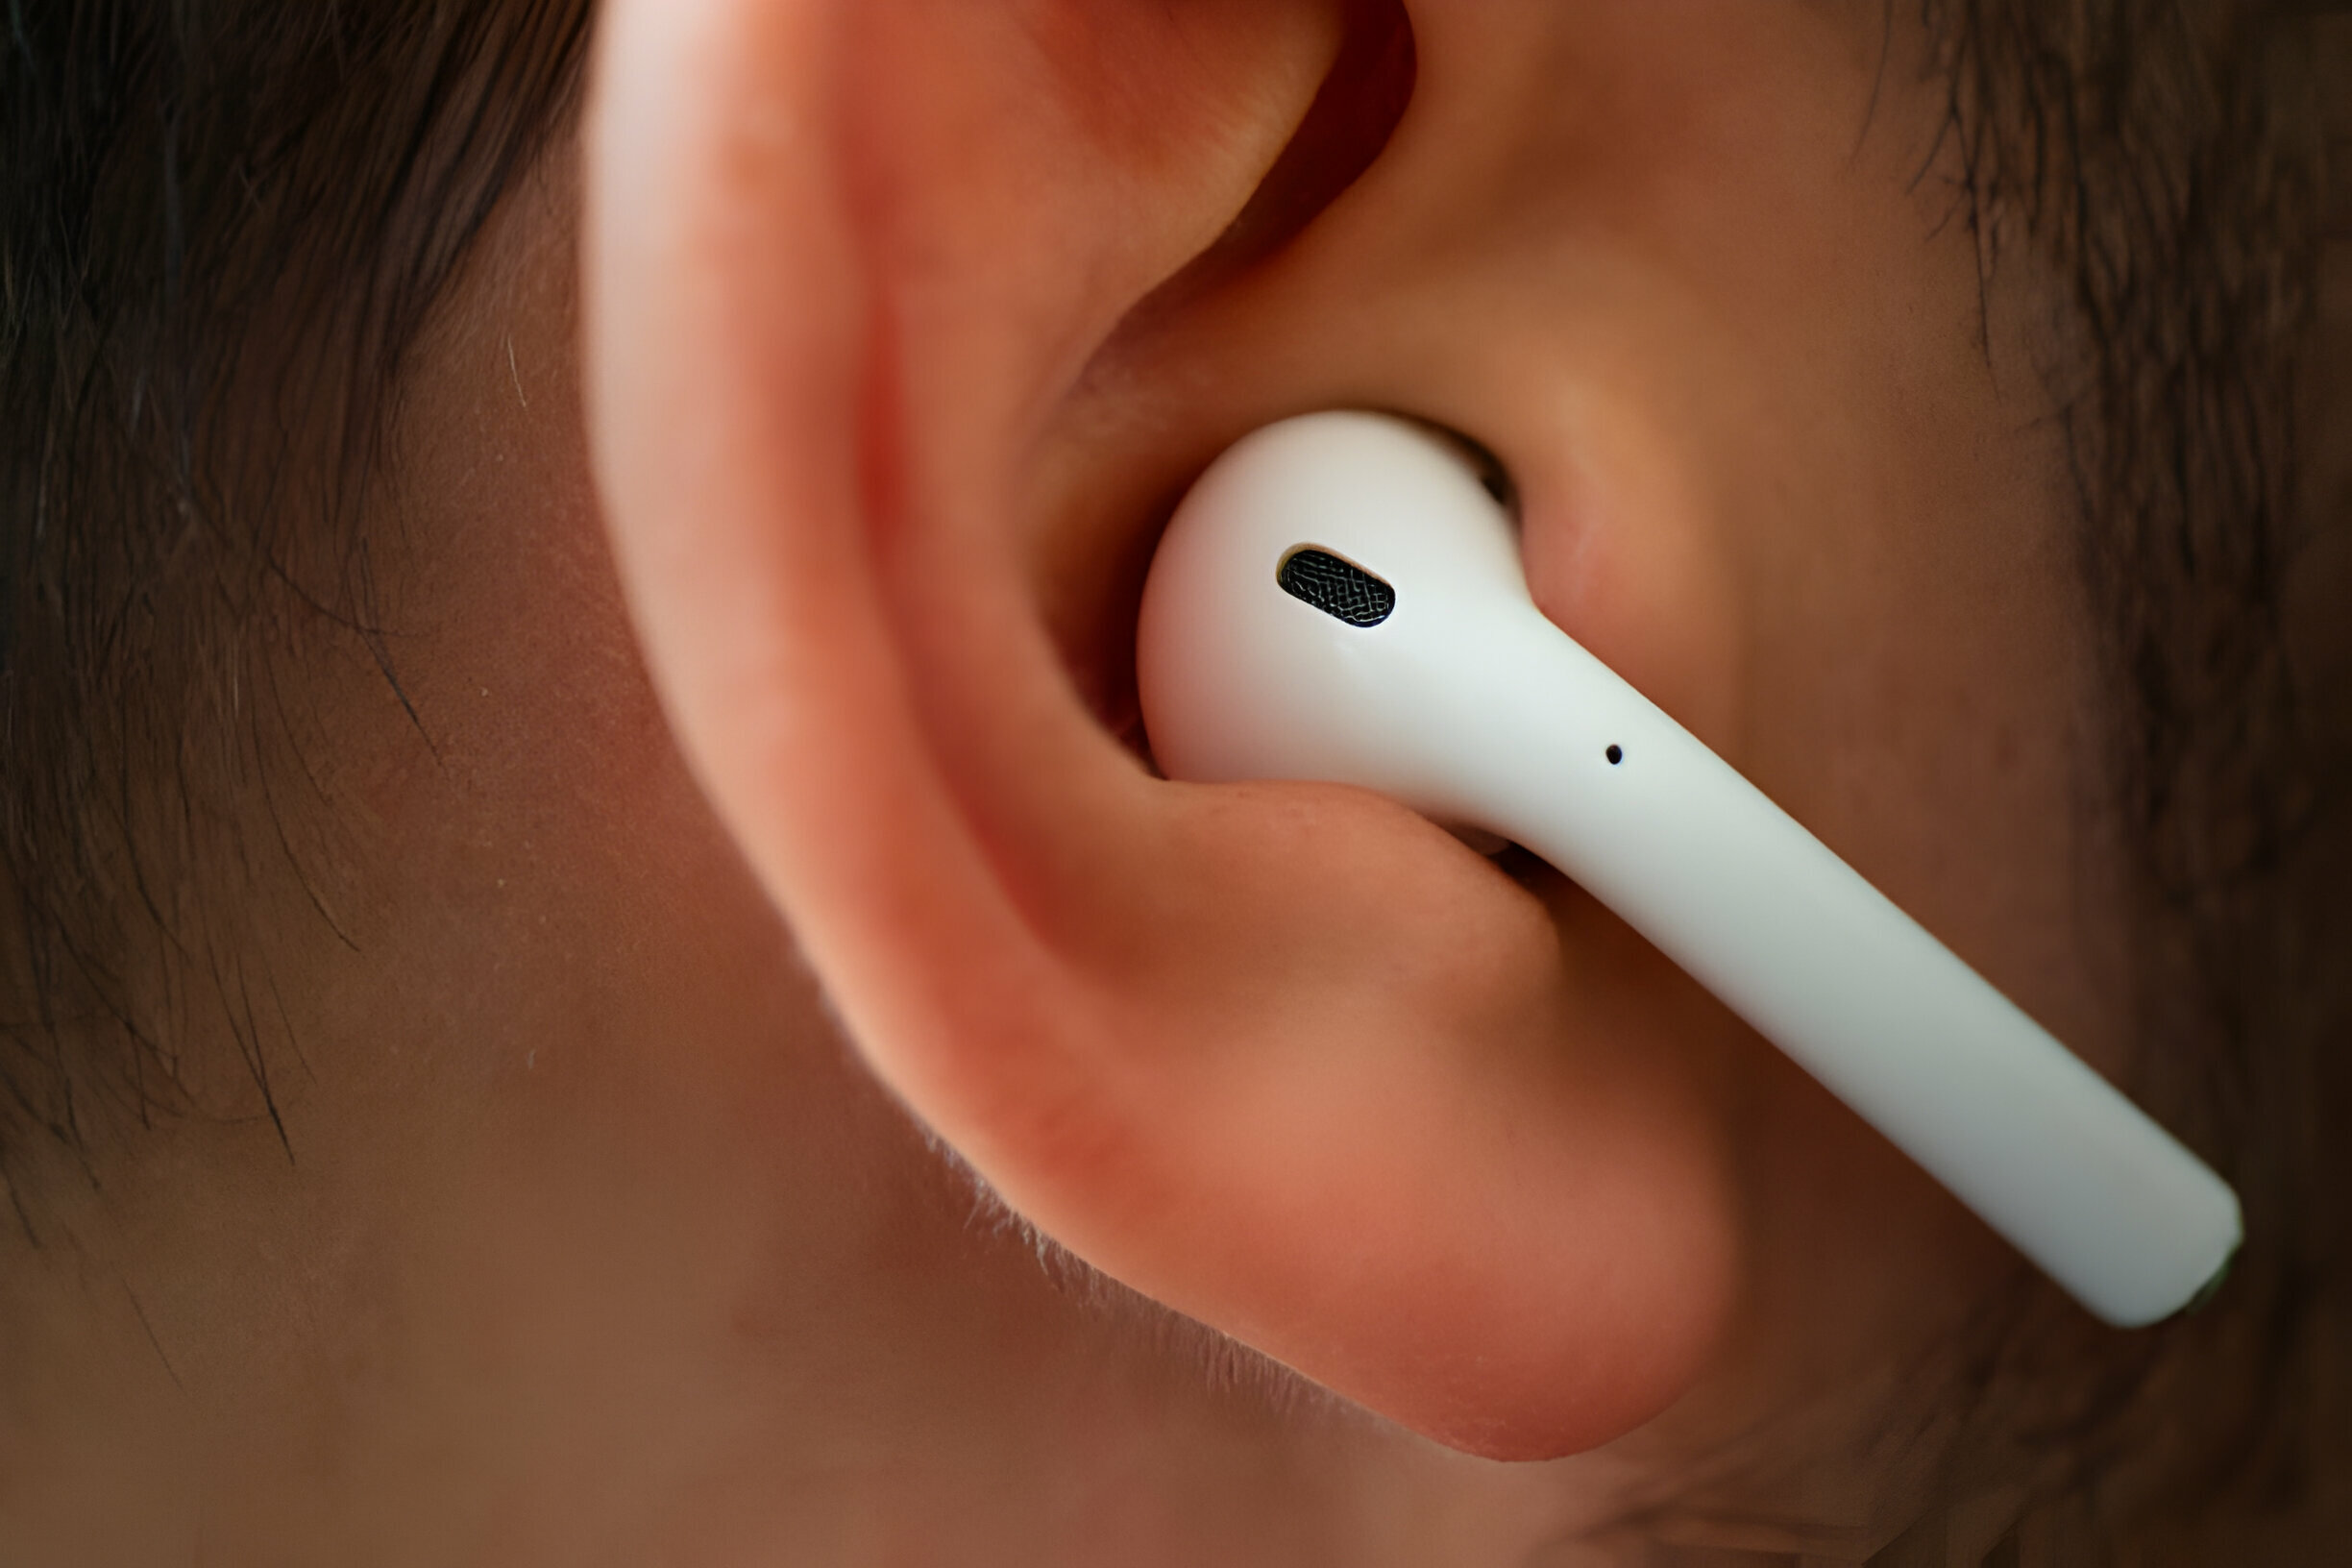
Airpods are placed directly in the ear canal with each use. In the ear, they can collect wax, dirt and other elements. This makes the airpods a breeding ground for bacteria. You can then introduce the bacteria into your ear when you use the airpods, and the bacteria can result in an infection.
In addition, the waxy residue can block the grille and prevent you from enjoying the best sound from your airpods. While you need to clean your airpods regularly, this should be done with care. Even waterproof airpods can be damaged when they are cleaned improperly.
How Often to Clean Airpods and Their Case
Both airpods and their case should be cleaned frequently to prevent bacteria from growing on them. The airpods should be cleaned within 72 hours of the last use. While you should follow the easy cleaning steps at least twice per week with daily use, cleaning is not as frequent if you use your airpods less frequently.
How to Clean Your Airpods, Earbuds and Wireless Charging Cases
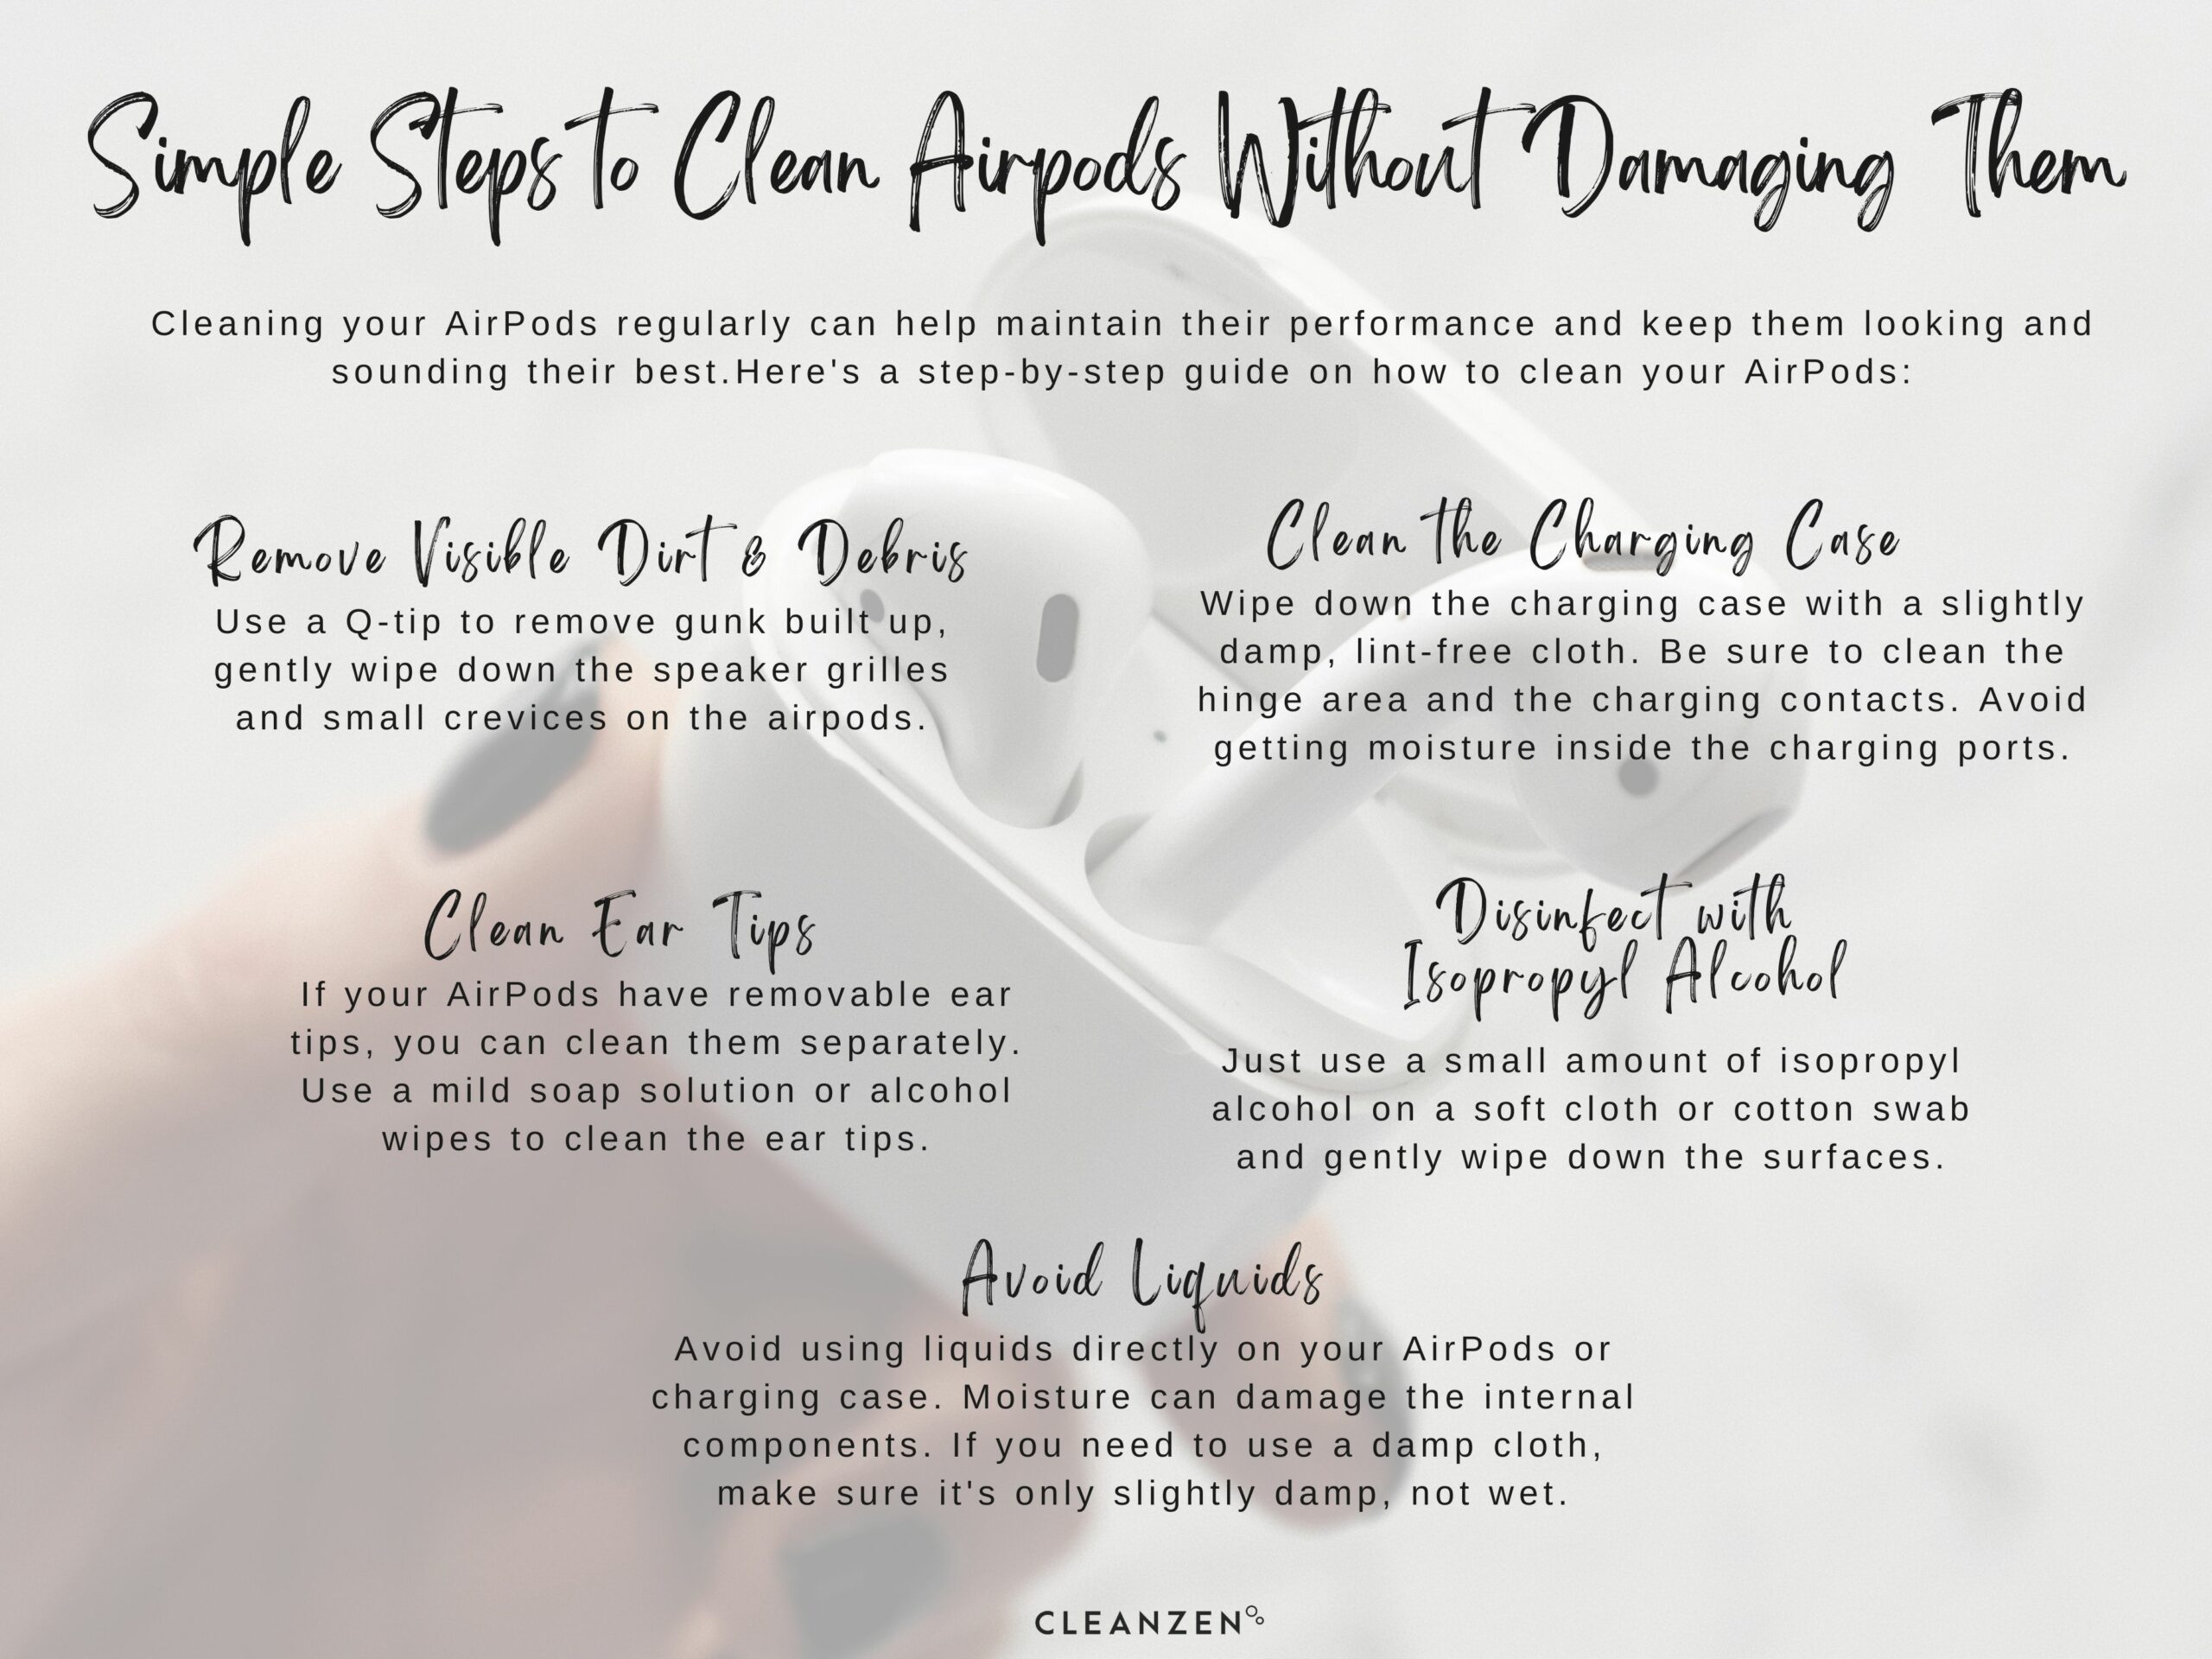
To clean your airpods, earbuds and wireless charging case, follow these steps.
- Gather the necessary cleaning materials, which include a microfiber cloth, a Q-tip and isopropyl alcohol wipes. A soft-bristle brush can also be used.
- Use the microfiber cloth to wipe down the exterior of the airpods and earbuds as well as the charging case.
- Using the Q-tip, gently wipe down the speaker grilles and small crevices on the airpods. This will remove much of the gunk that has built up there. However, avoid applying too much pressure as they may cause damage and press the accumulated wax and debris behind the grille. Once there, the gunk cannot be removed.
- After the debris has been removed, you need to disinfect the airpods. With either a lightly damp microfiber cloth or an isopropyl alcohol wipe, clean the airpods. You can use these same supplies to clean the earbuds and the wireless charging case.
- If the earbuds have silicon tips, remove these. Using soap and warm water, clean them with a soft cloth. Ensure that they are completely dry before putting them back in place.
- There may still be dust and other debris in the charging port of the wireless charging case. Using a clean toothbrush or another soft-bristle brush, gently brush this area until it is clean.
There are alternative cleaning methods that are equally as effective. For example, you can use a pencil eraser to wipe the gunk away. This should be done with care. Use the microfiber cloth to remove any remaining residue. You could use brush off the grille gently with an anti-static brush, such as a paint brush or a makeup brush. A dry toothbrush with soft bristles is another option.
What to Avoid When Cleaning Airpods and Earbuds
When cleaning your airpods, it is critical to avoid getting them wet. This can cause irreparable damage and lead to the need for a replacement. You also should not use a standard towel or cleaning rag as these can be too abrasive and may cause damage.
Always refer to the official Apple guidelines for cleaning your specific AirPods model, as different models may have slightly different cleaning recommendations.
How to Keep Your Airpods Clean Longer
While cleaning your airpods and charging case is relatively easy to do, keeping them cleaner for longer can save you time and energy. In addition, it may help you to enjoy the best listening experience from them. Rather than wait every few days to deep clean your airpods you can simply wipe them down immediately after each use. Simply keep a small microfiber cloth in the case for easy access.
You should also store your airpods in the case at all times unless they are being used. This will prevent excess dust and dirt from landing on them. Following personal hygiene steps can also help you keep your airpods cleaner for longer. Clean your ears with a combination of glycerin, mineral oil and hydrogen peroxide regularly. In addition, you should not allow other people to use your airpods.
FAQs
Is It Ok to Clean Airpods with Wet Wipes?
Wet wipes can be used to clean the exterior surfaces of airpods. However, the moisture should not get on the charging ports or the airpods’ grilles. Be aware that standard wet wipes do not have disinfectant or antibacterial properties. Because of this, it is best to use isopropyl alcohol wipes to clean airpods.
How Do You Clean Ear Wax Out of Airpods?
Wax buildup is a common problem with airpods. Each time the airpods are inserted into the ear canal, additional wax can stick to the grilles and various crevices. To clean the ear wax, use a clean microfiber cloth to lightly wipe down the surfaces. You can also use a soft-bristle brush or a Q-tip.
Does Apple Charge to Clean Airpods?
If you live near an Apple Store or are planning to pass by one soon (find a store near you), you can stop in for professional airpod cleaning. By doing so, you can ensure that the airpods are thoroughly cleaned and are not damaged during the cleaning process. This service is available to Apple customers at no cost.
Your airpods are only one of the many things that require care and maintenance on a regular basis. Finding time to care for all of your belongings can be a challenge. With Cleanzen cleaning services, you can free up valuable time by letting our professionals clean your home. Contact us today to inquire about rates and services.
The post Simple Steps to Clean Airpods Without Damaging Them appeared first on Cleanzen.
from Cleanzen https://cleanzen.com/blog/how-to-clean-airpods/
via IFTTT


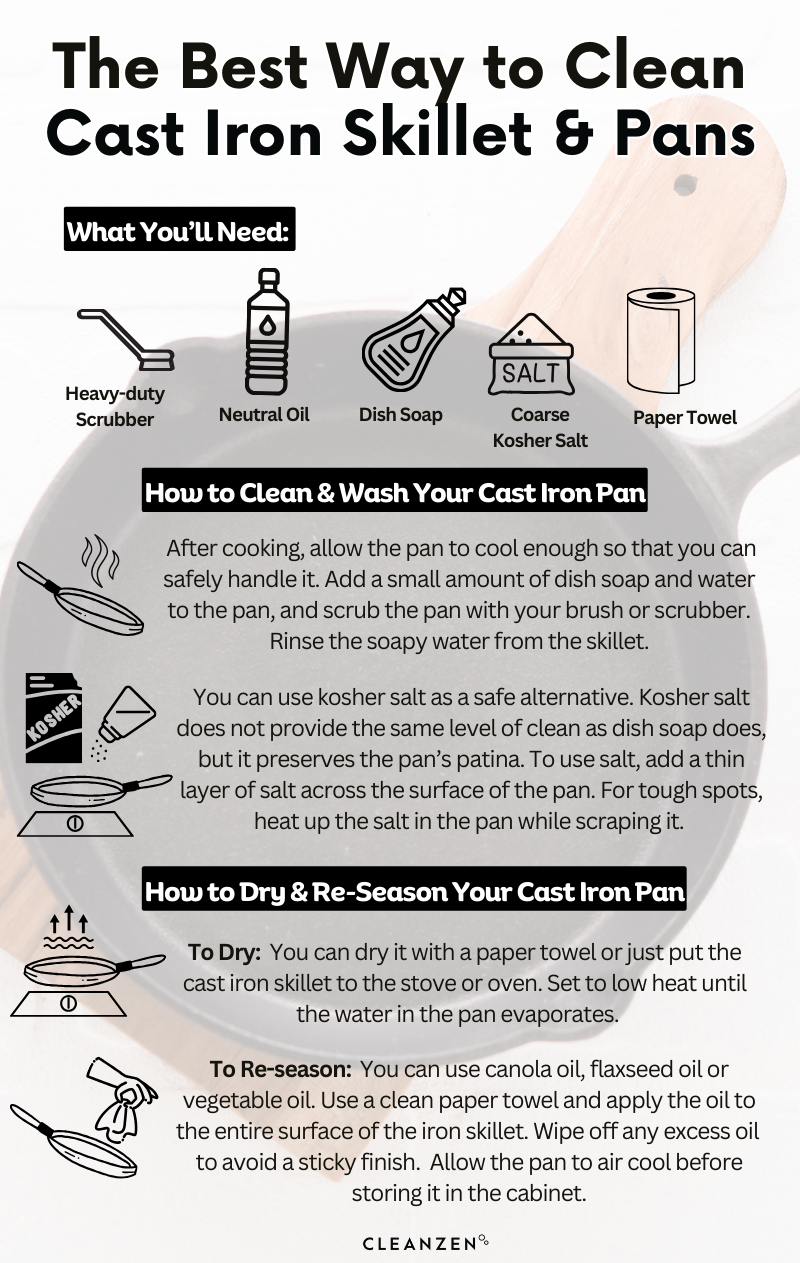

 Using a spatula, scrap off the stuck-on food bits. For tough spots, you can add hot water or heat up the salt in the pan while scraping it. When the food particles are gone, you can continue to the next step.